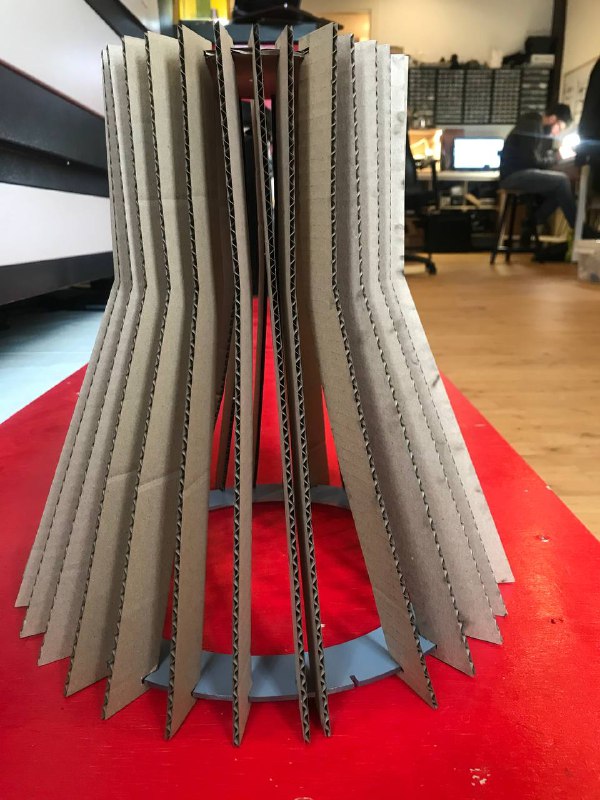
 Assembled lampshade!
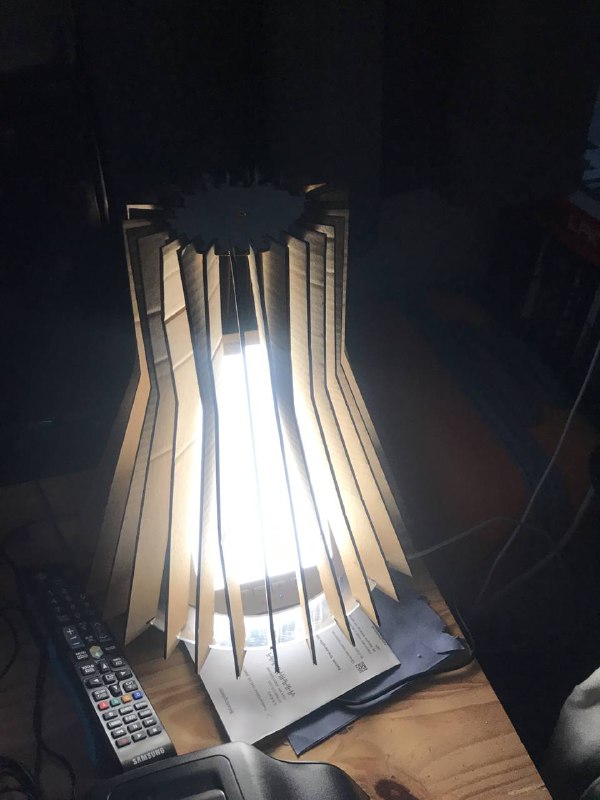 Tested it out at home
Laser Cutter
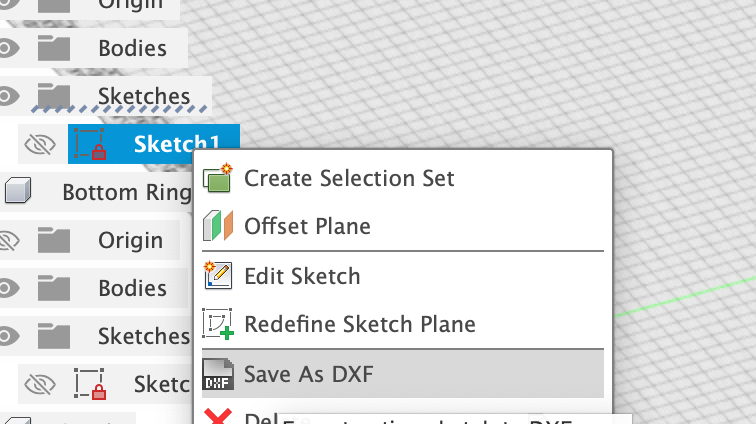
- Save sketches as DXF, make sure you got the right thickness for your drawings.
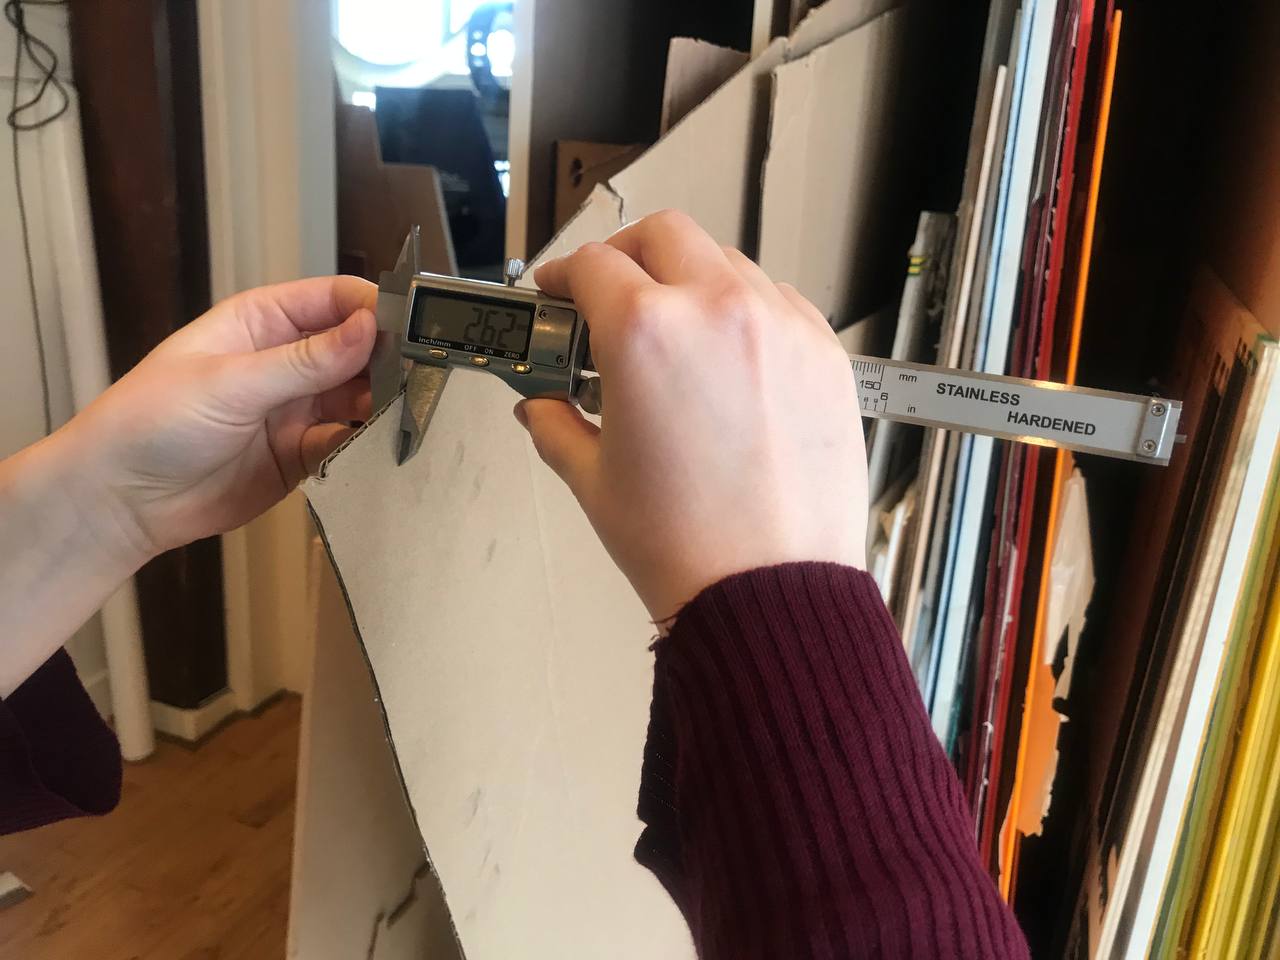 Measure the thickness of the material you intend to use and adjust accordingly
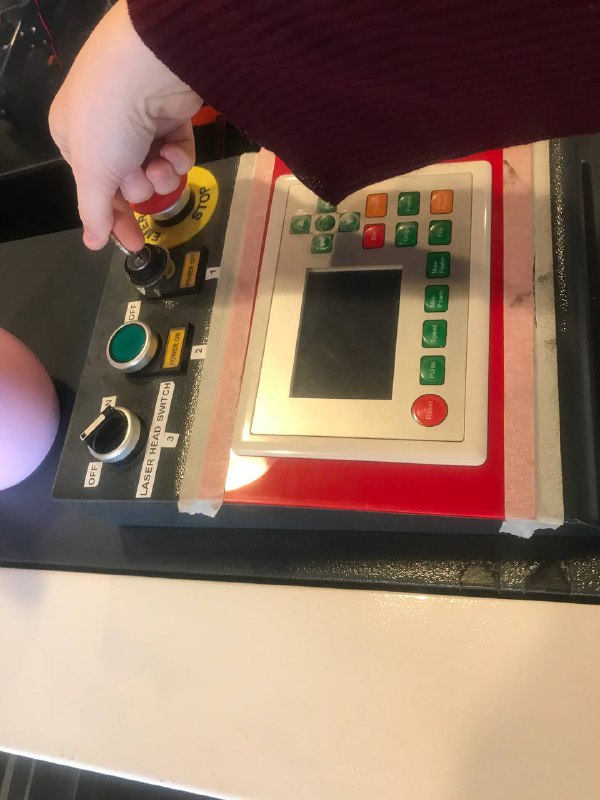
- Turn on laser cutter (1 & 2)
- Place your material inside the printer, use tape, weights, what is needed to keep it flattened.
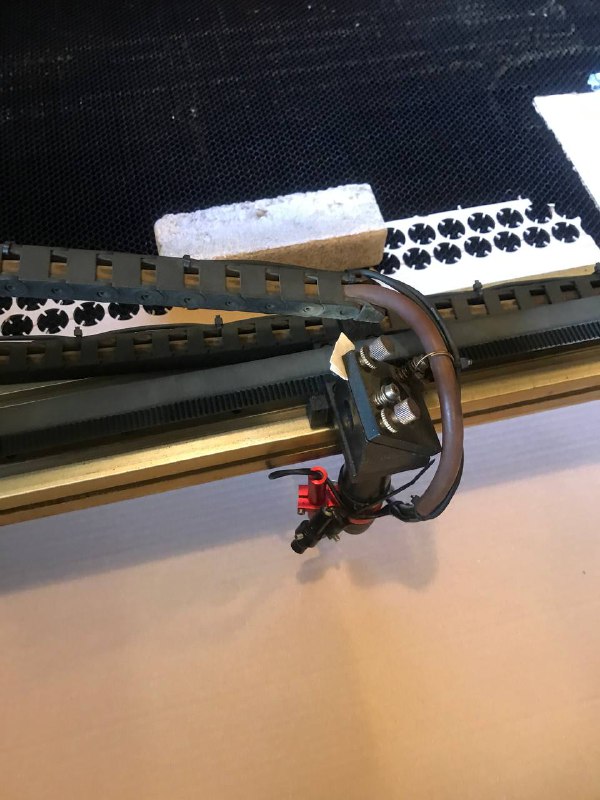
- Fix the tip of the laser pen, counter clock wise to loosen it and clock wise to tighten it
 adjusting the tip
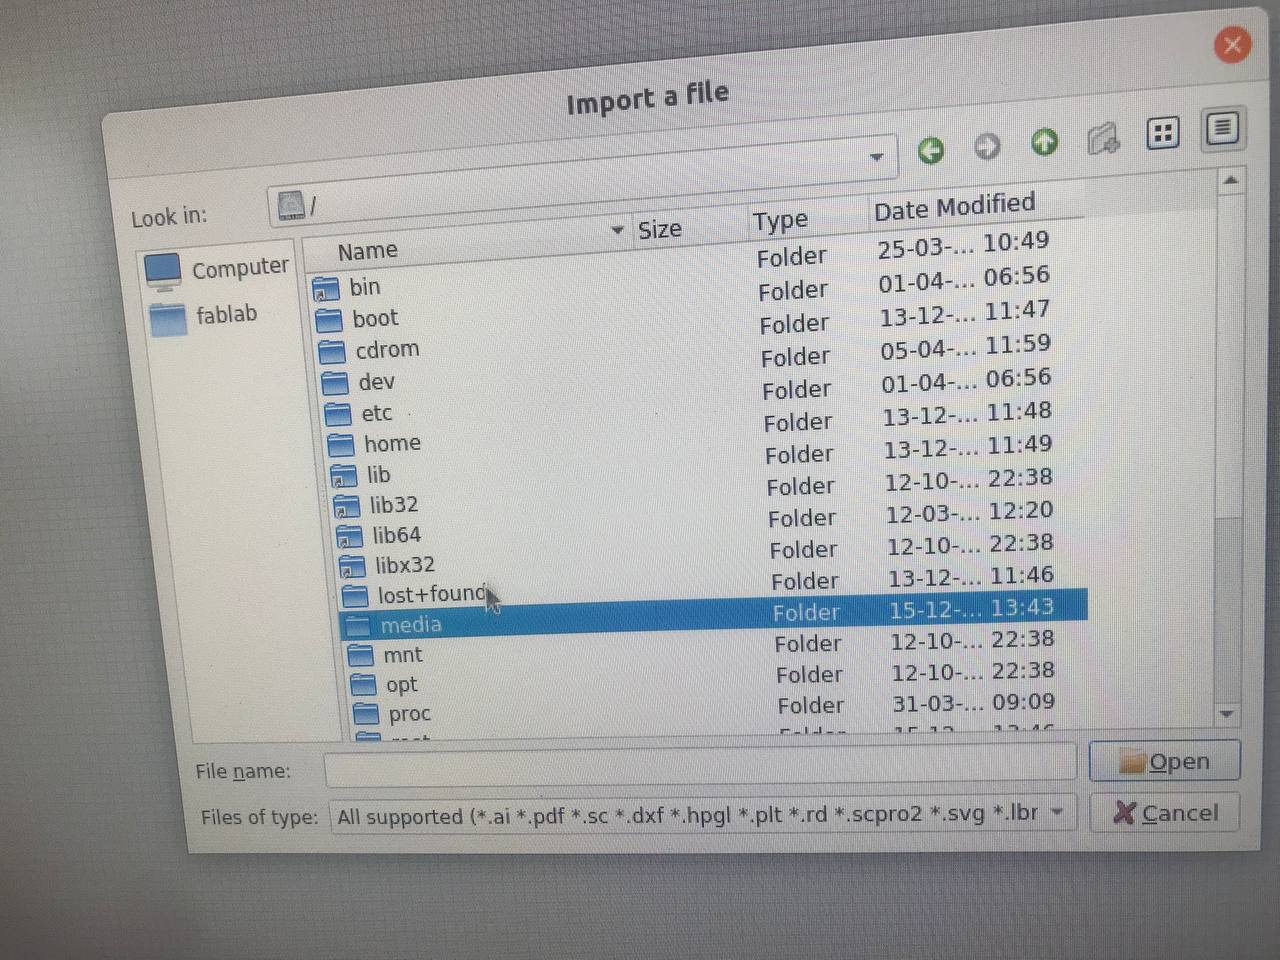
- Go to lightroom and open your file there.
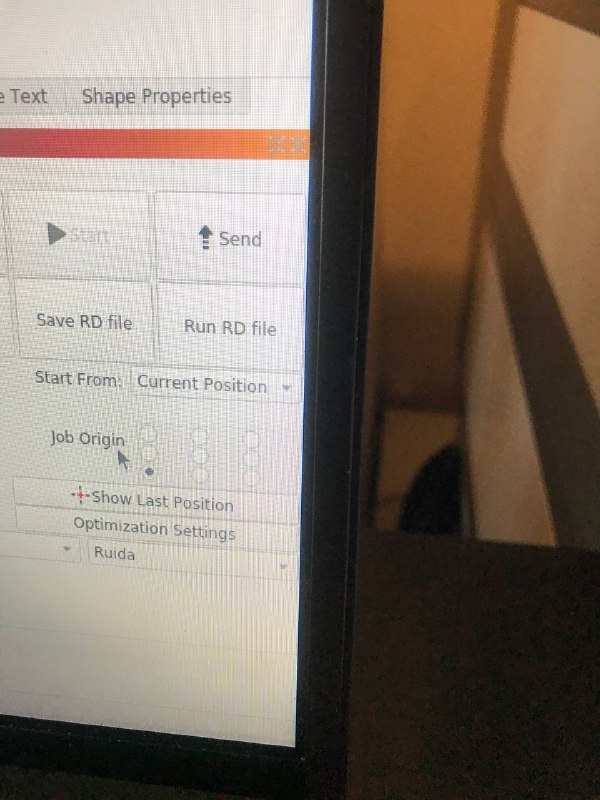
- Set job origin
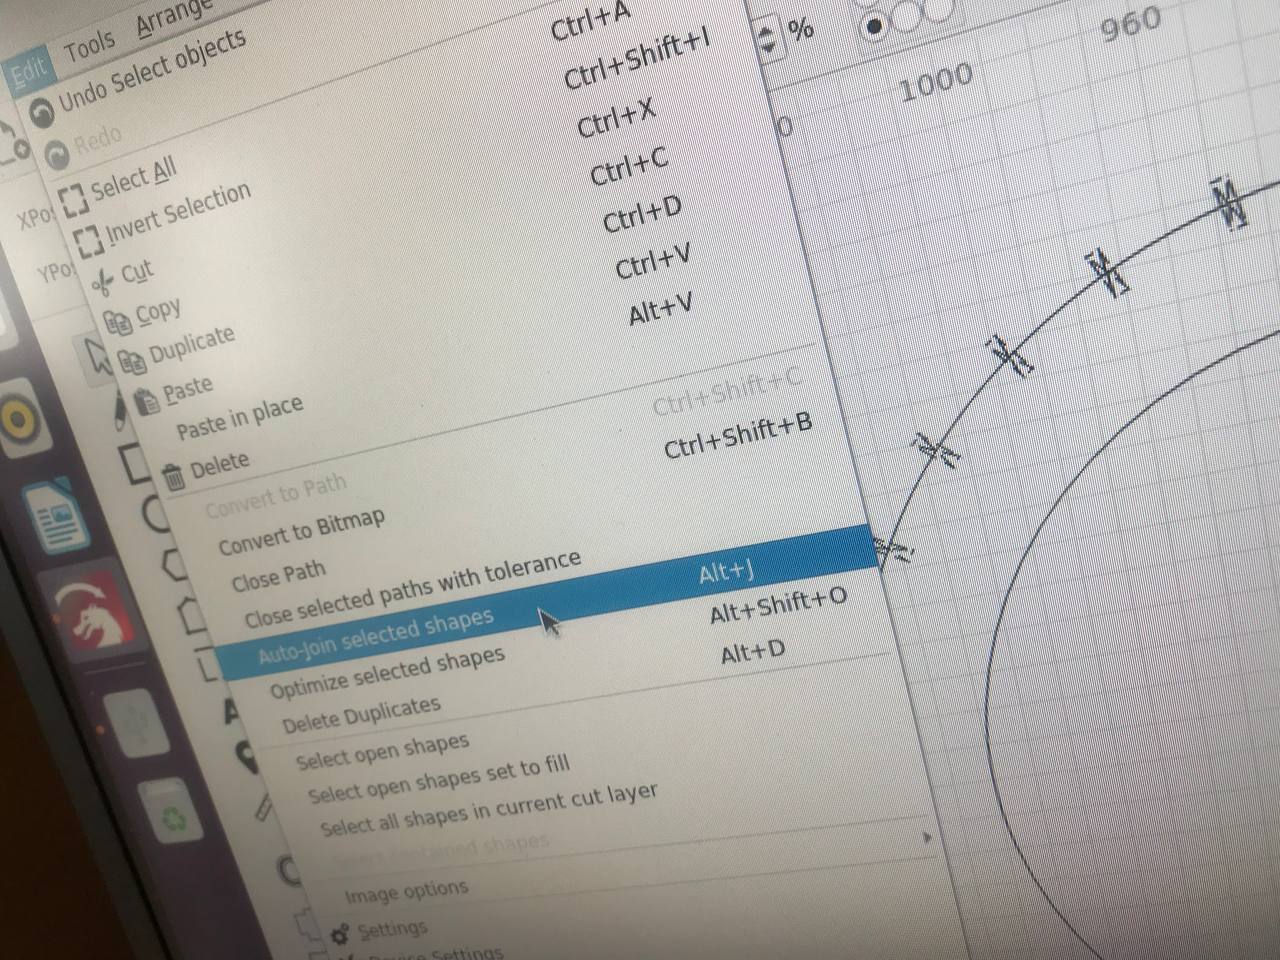
- Check if there are open objects and if necessary close them!
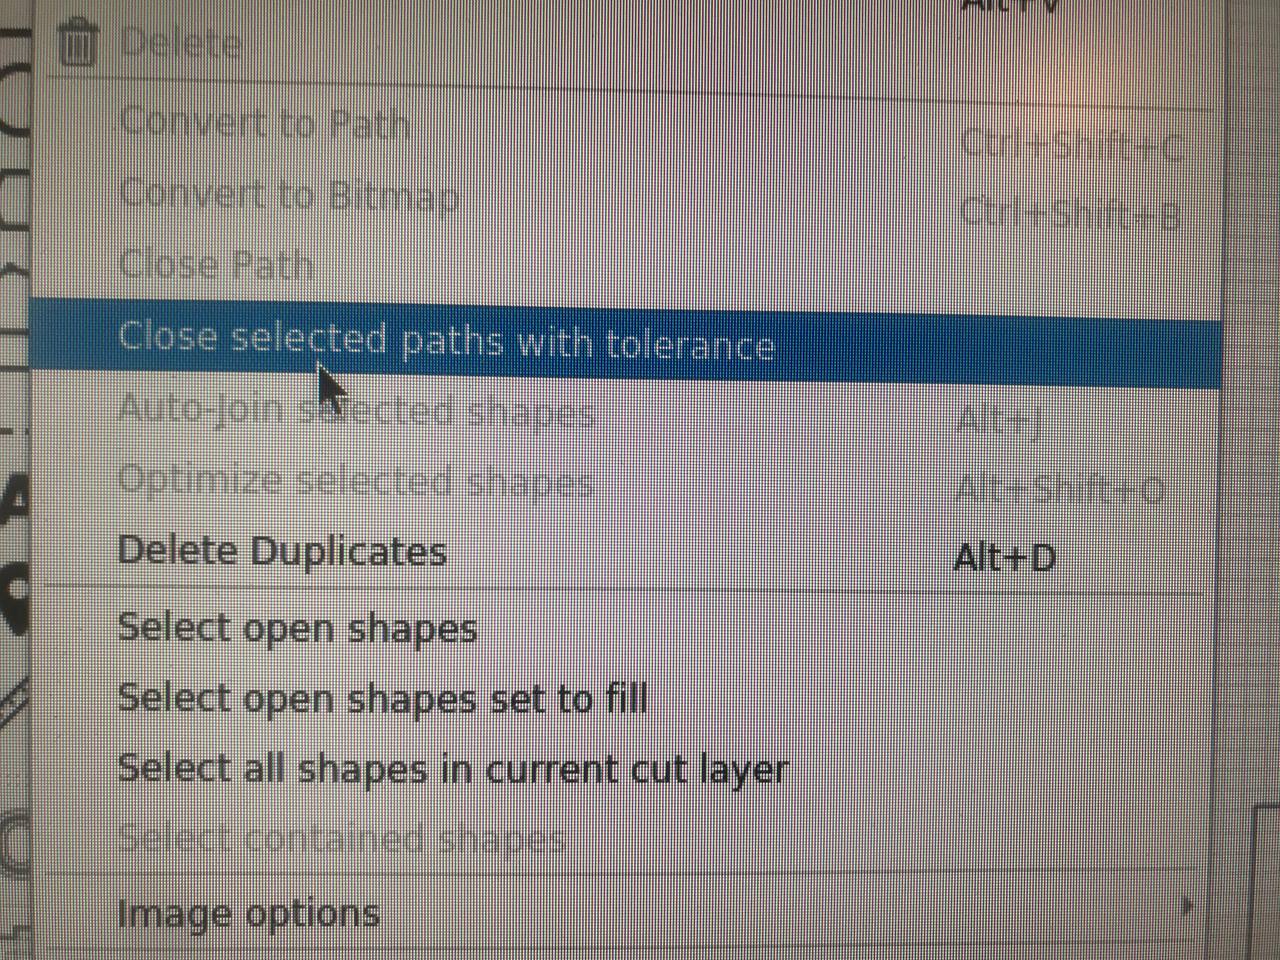
- If the file is not as you intended for it to be, you can do some fixes, for example, with boolean tools, joining objects, grouping, etc…
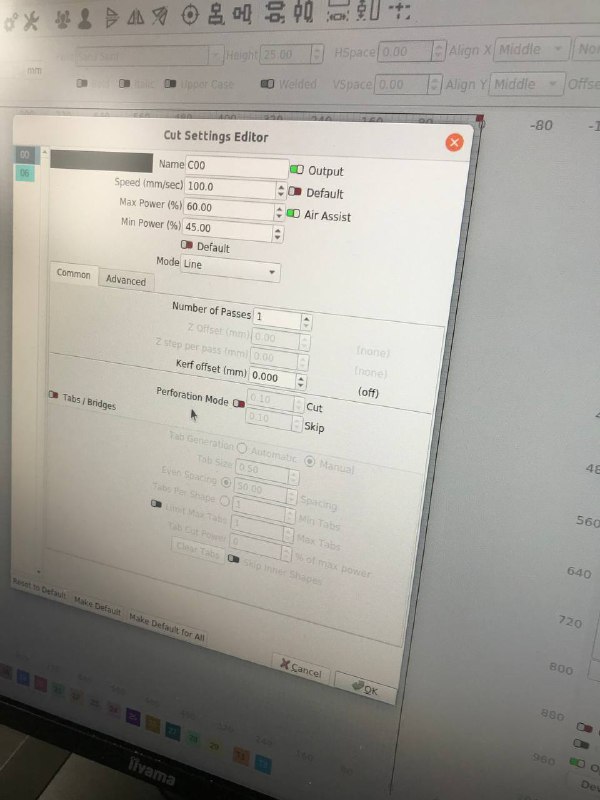
- Adjust the speed and power of the laser cutter, you can check the templates hung on the wall to see what is appropriate
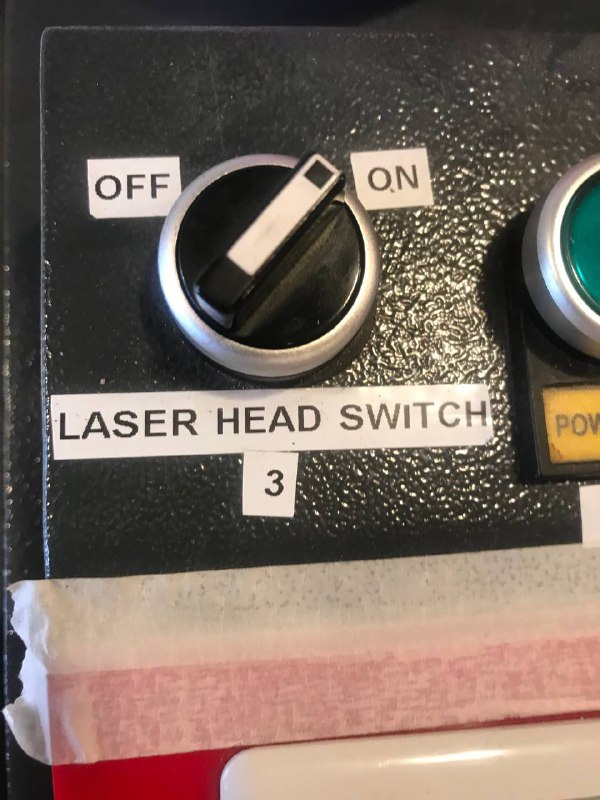
- Switch on the laser cutter (3)
- Turn on the fan
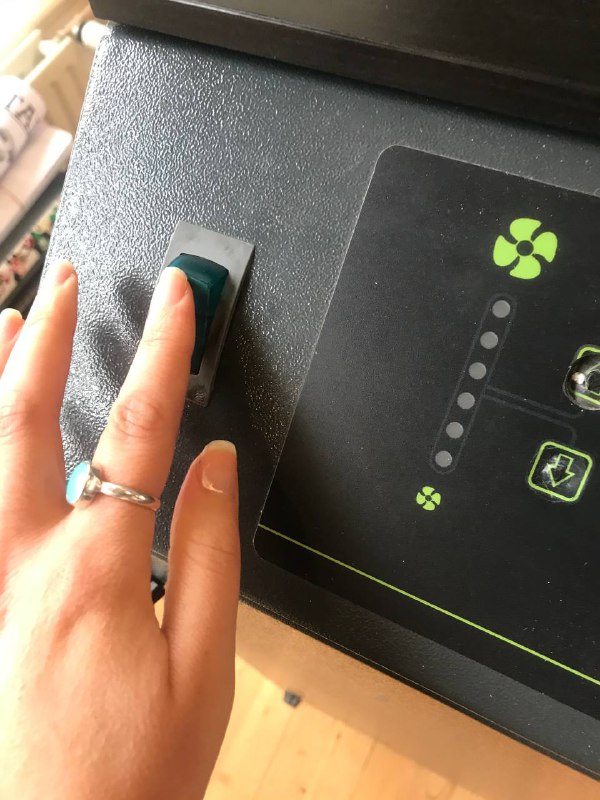
- Make sure the origin is set correctly, press frame to test out
- Press Play! after the machine is done cutting, wait a bit before opening it, if it starts burning, stop or pause and use the water sprinkler to cool it down.
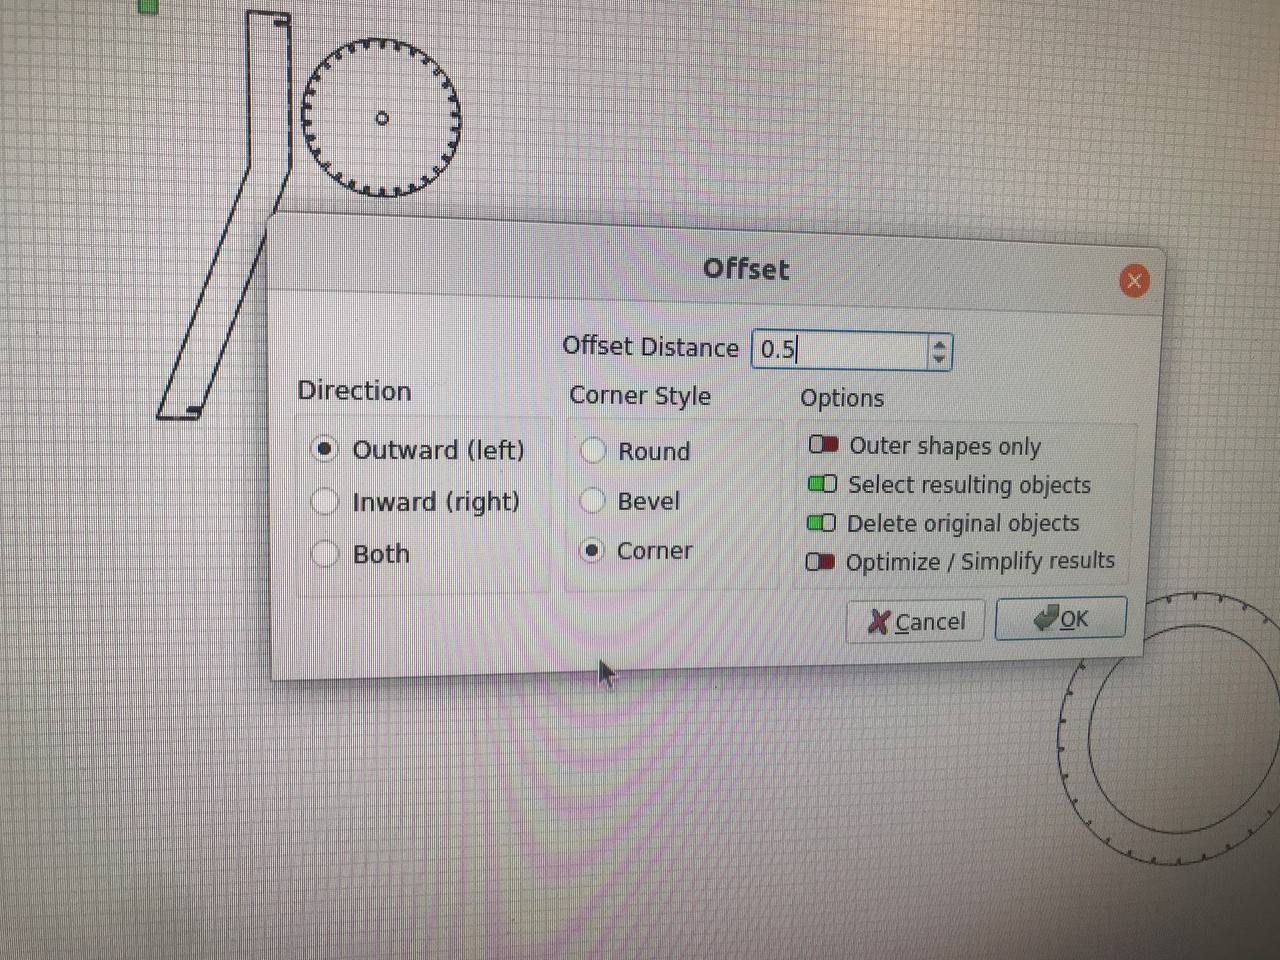
- If necessary offset the objects (after testing out)
Side Hustle
Learning a bit of coding, I started watching the course called Training Code on youtube, getting into processing!
https://www.youtube.com/channel/UCvjgXvBlbQiydffZU7m1_aw
- Setup & Draw
- Variables
- If/else statements
- Random
- AND OR NOT
- Boolean expressions