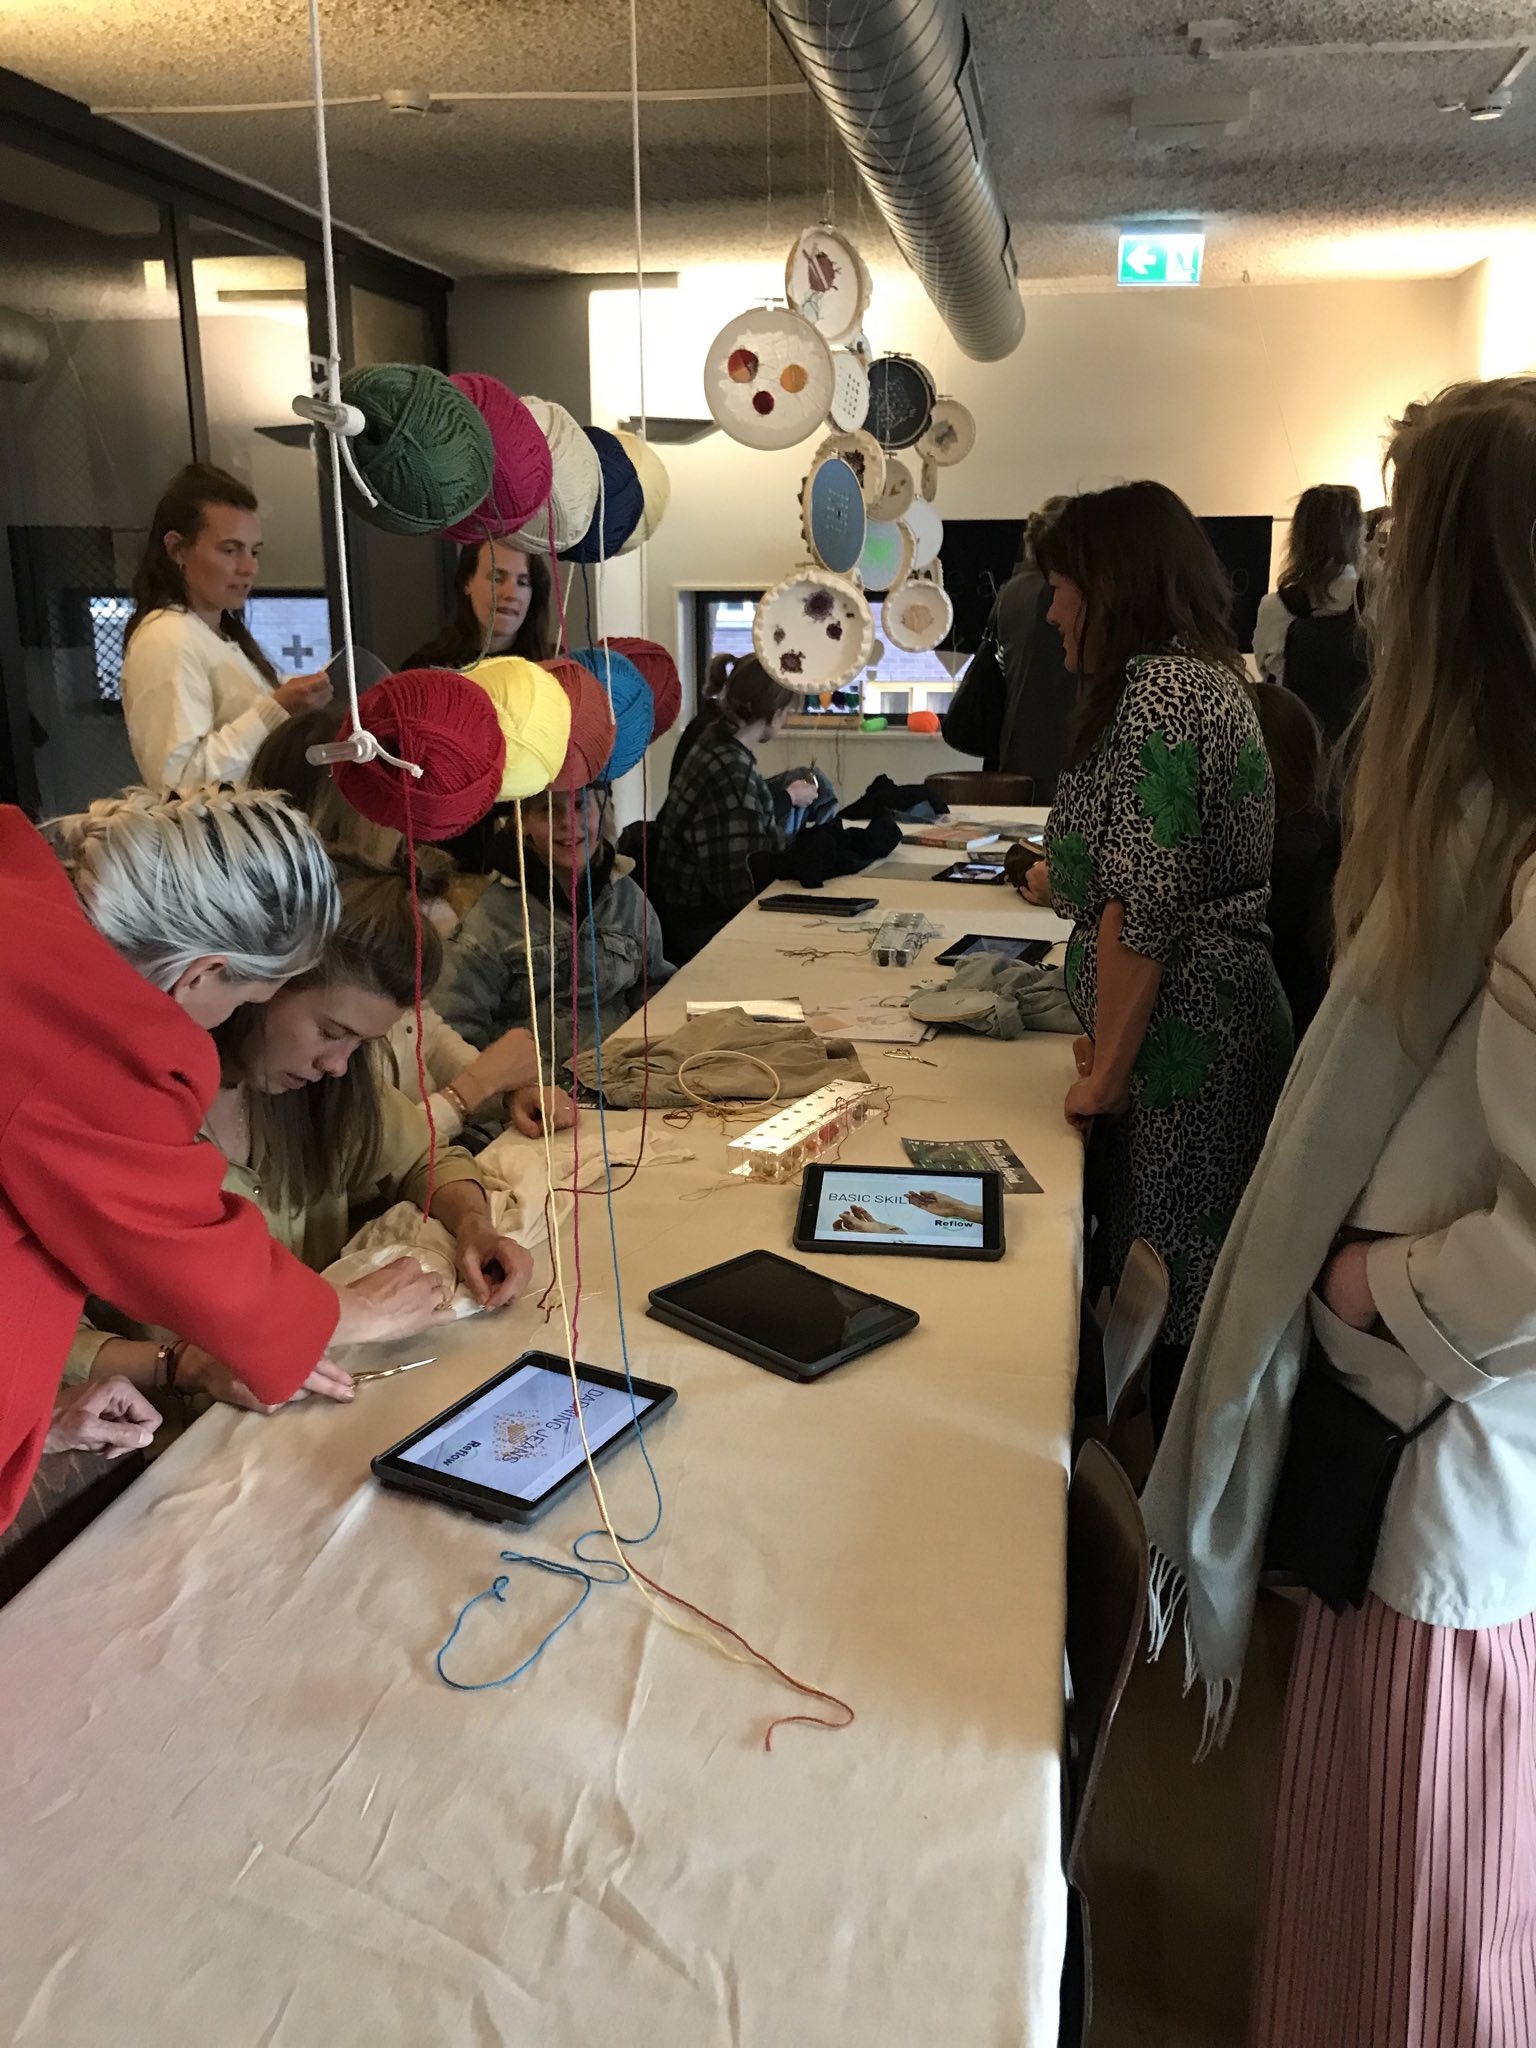
 Boxes being used at a workshop
Preparing the box with Fusion 360
Parametric design and making things simpler
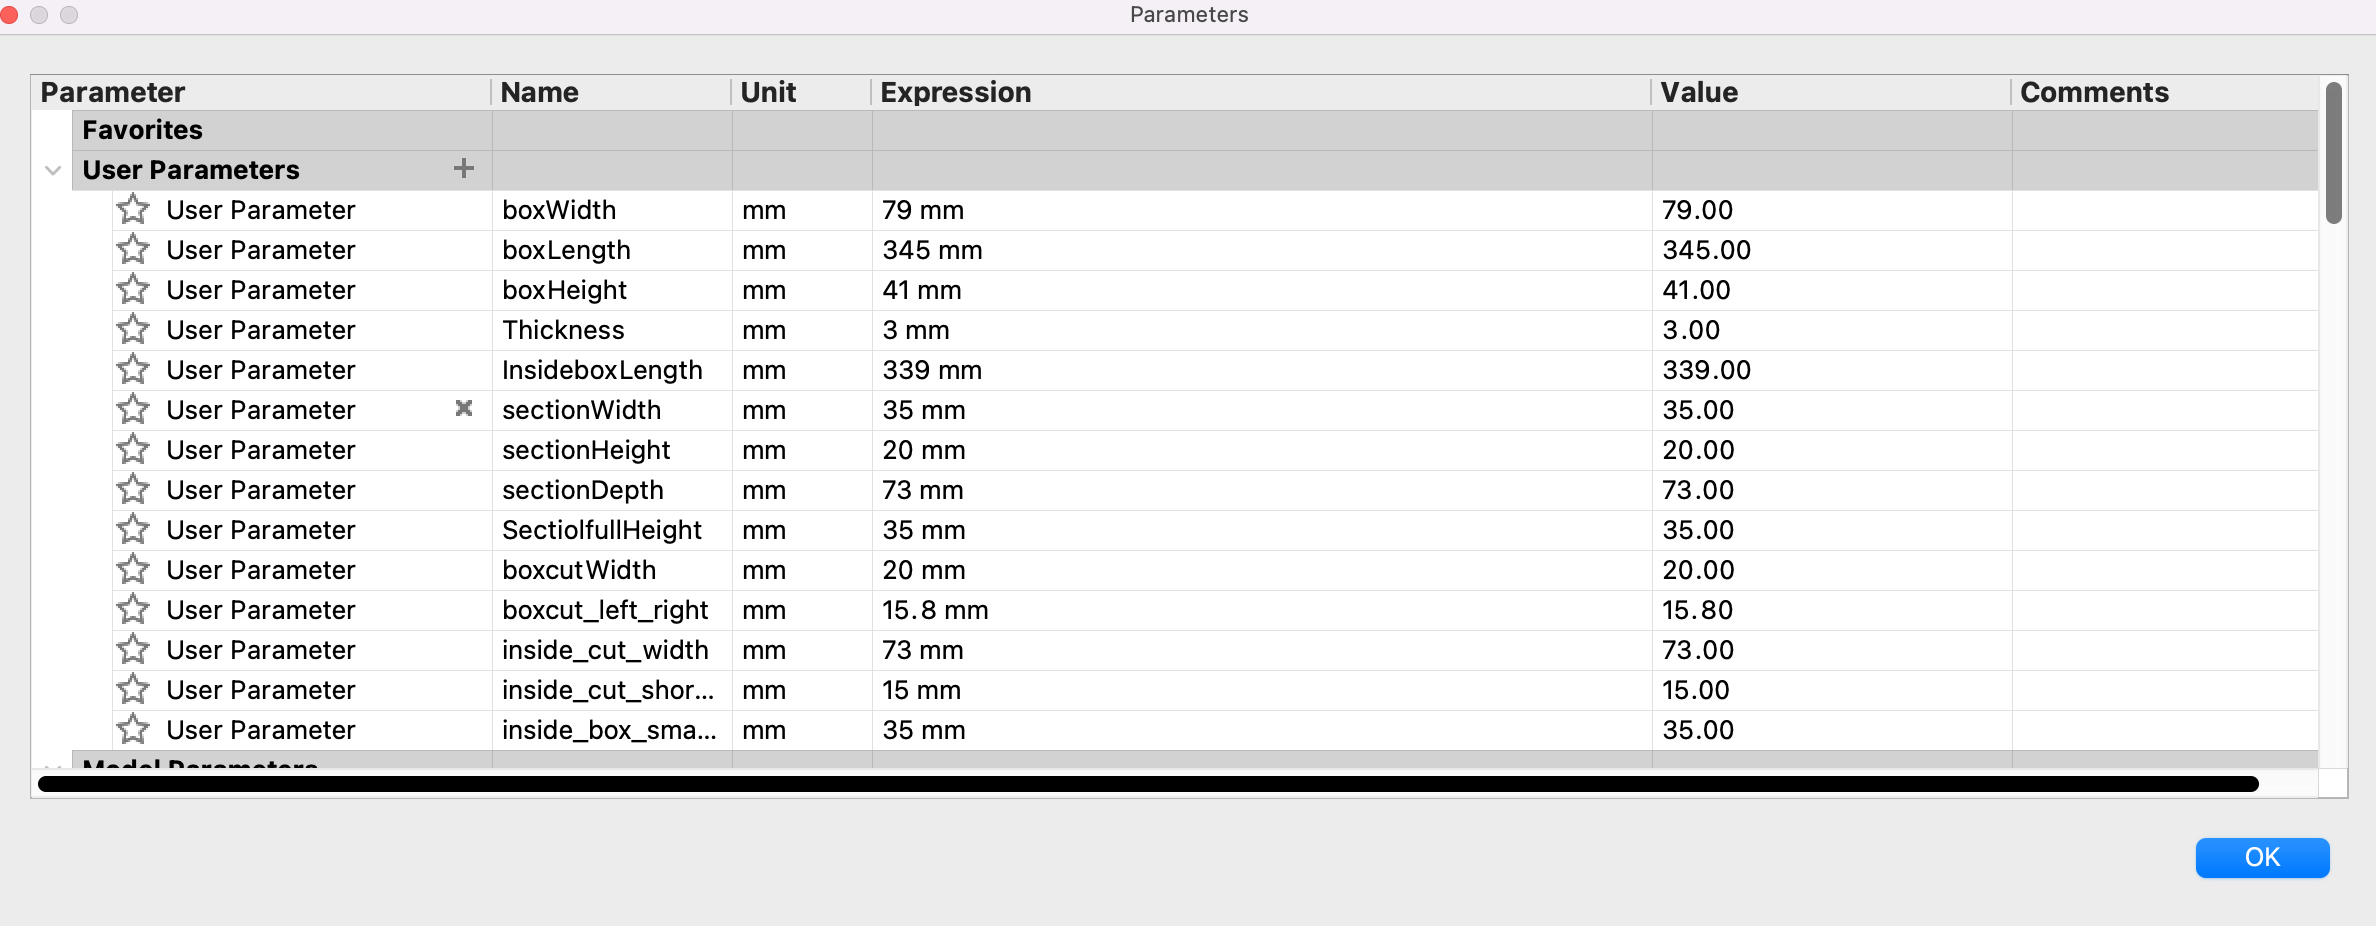
I started with a few ones and added more during the design process
- I started off with assigning the paramters using change » modify parameters
What went wrong? I intended to simplify the process by preparing the measrements in a parametric way, yet it did not work according to plan. What I missed was assigning a specific shape to the measerements and then using the rectangular pattern in oder to automise the process for the rest of the repeated patterns.
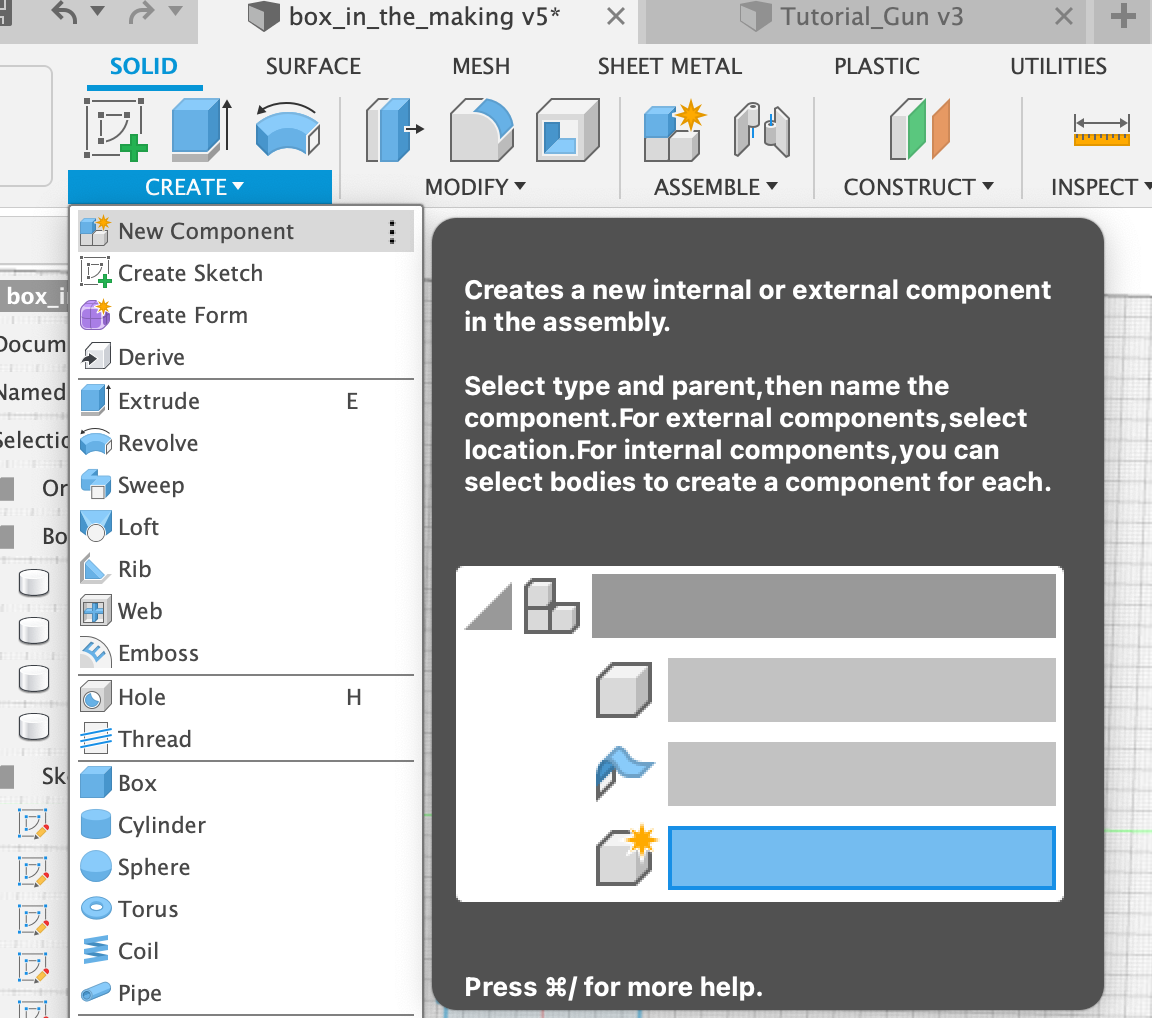
Also, I forgot to do this step in the beginning. Creating a component in the beginning for each piece
 Rename the component to the assigned piece, i.e. Lower Side of the Box!
-
I drew the main parts using the sketch command. For instance : Choose, Top view plane, sketch and assign each line to its paramter.
-
Extend to thickness parameter.
-
Repeat process for all the sides of the box!
-
The tricky part! Adding the joints.
One way to go about it is to re-edit the sketches. For instance: the front side.
-
First draw a line
-
Assign the thickness parameter between it and the edge of your rectangular! repeat process on all sides!
-
Draw a small line between the bottom and the left side, width wise, stick to the thickness, length wise according to the spacing you will have! For instance 1 cm, make sure this is done through an assigned parameter.
-
Use the rectangular pattern to repeat the process for those lines… choose direction of your pattern(might need to add a negative direction if its going in the opposite direction), how many repeats and specify the measurements (again according to your parameter) , also choose spacing for the distance type. And now when you edit the first line, it will autmatically edit all the repeated lines for you!
-
Repeat process on the other side or simply mirror, then do the same on the horizontal side as well…
-
Edit extrude with the edit feature, add the joints in…
-
Repeat process for the other sides…
-
Then use modify - combine to add finger joints on the bottom/upper pieces - target body, lower piece and the tool bodies are going to be all the sides of the box and for operation select cut! Tick Keep tools
-
Select Inspect - Interference to make sure all the sides are ok! no interferences detected which means its good to go!
-
Save the sketches for all the faces as DXF files
You could also create an extrude of the finger joint using parameters and then repeat pattern, then do the joining
Laser Cutter
What went wrong? forgot about the curve! for next time you need to offset, yet I’m not sure how much to make it tighter. Fixed the problem with glueing the boxes with acetone and cleanded up afterwards.
End Result